Today's post is the third 3D Bow tutorial in this week's series using the 3D bow cartridge. It is the 5 loop bow tutorial and is the largest of the 4. This particular bow does require a long brand to hold it all together. Do not try a small brad. It simply will not be able to handle all of the paper. At least the small brads I have didn't.
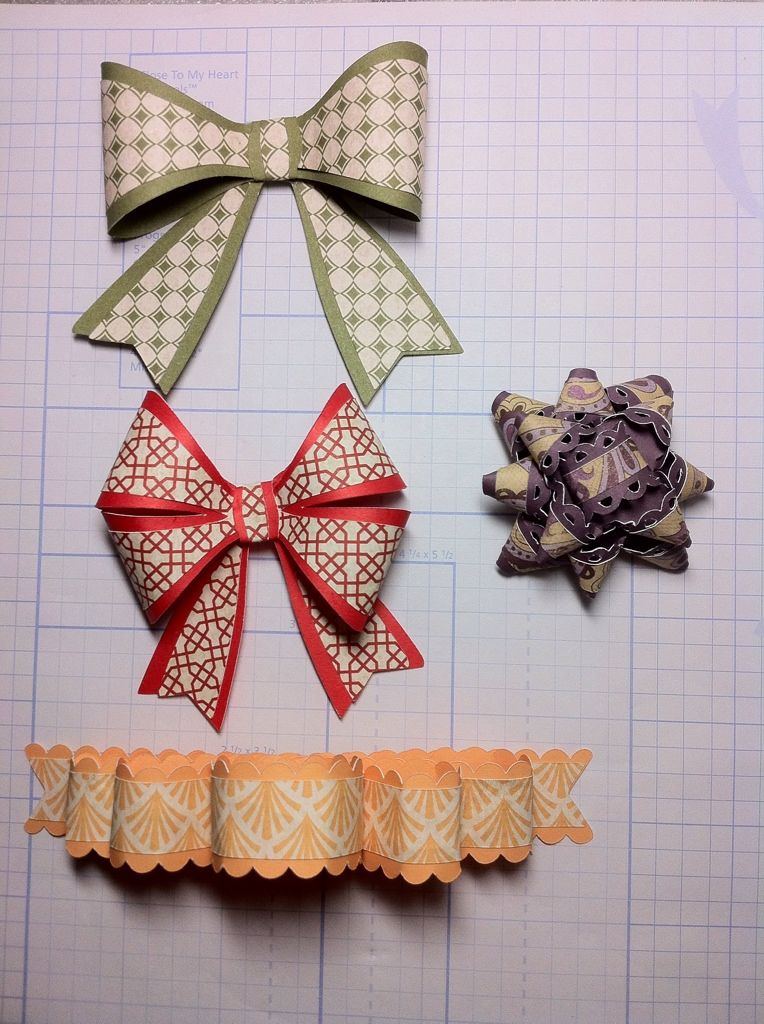 |
| The yellow bow on the bottom is the one I am showing you today. It is very easy to make and comes out quite large. This bow was cut at the same size as the others and was considerably larger. I used Close to My Heart cardstock and patterned paper. |
 |
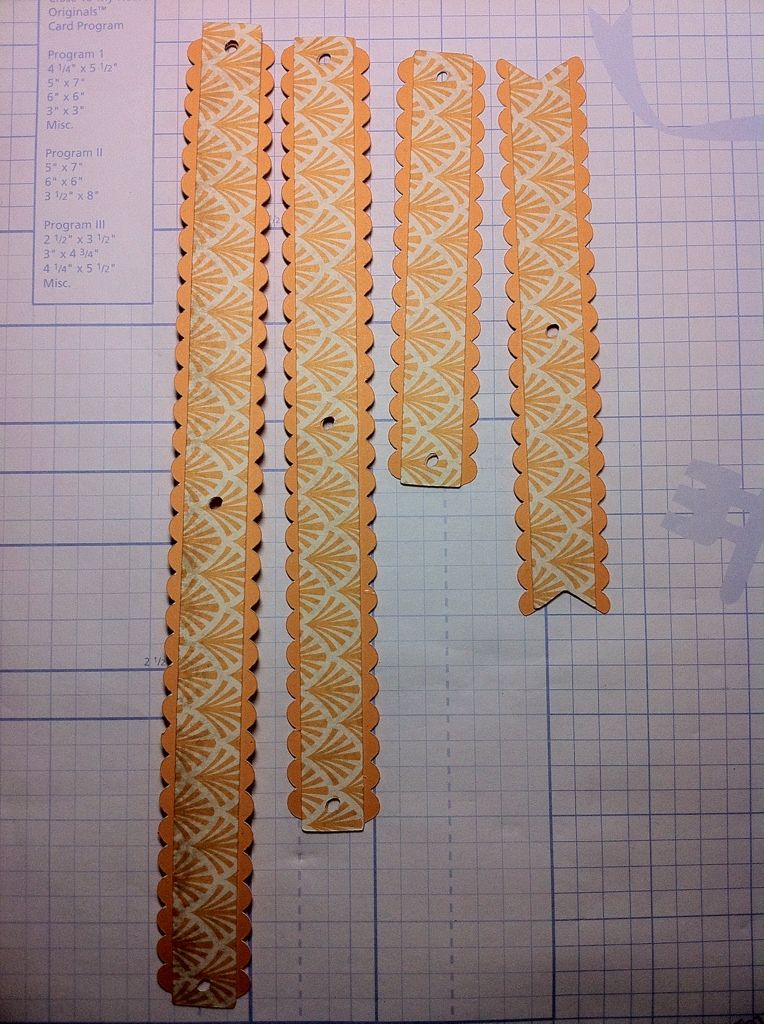
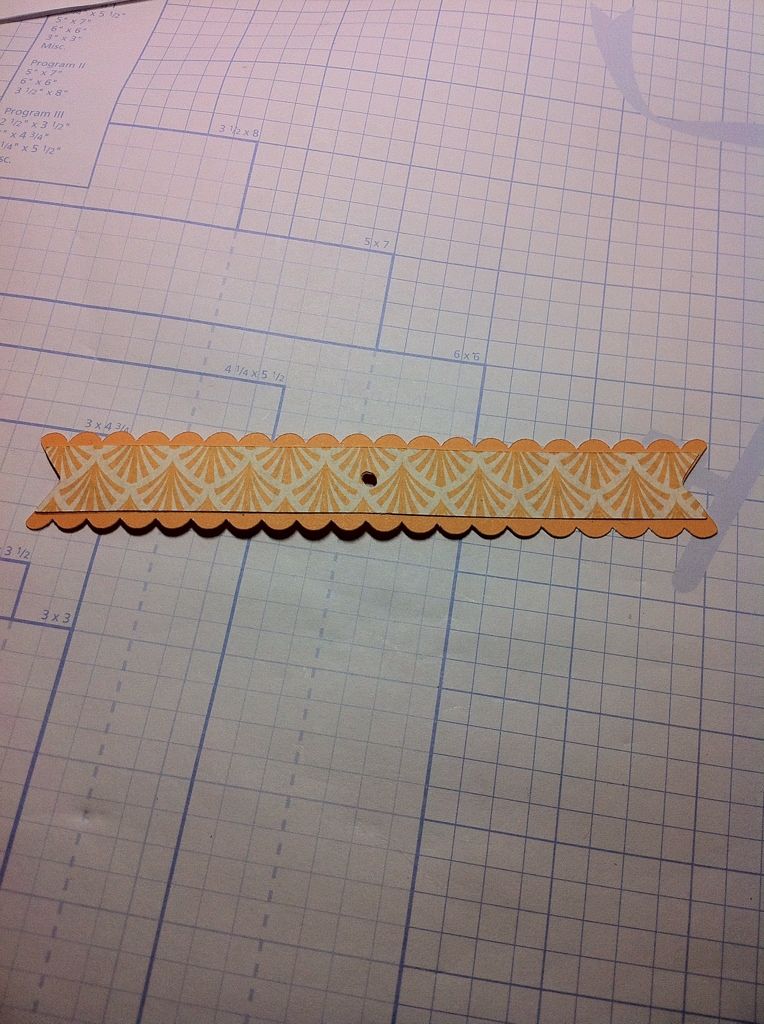
| This is the base cut and cut out at 4". |
 |
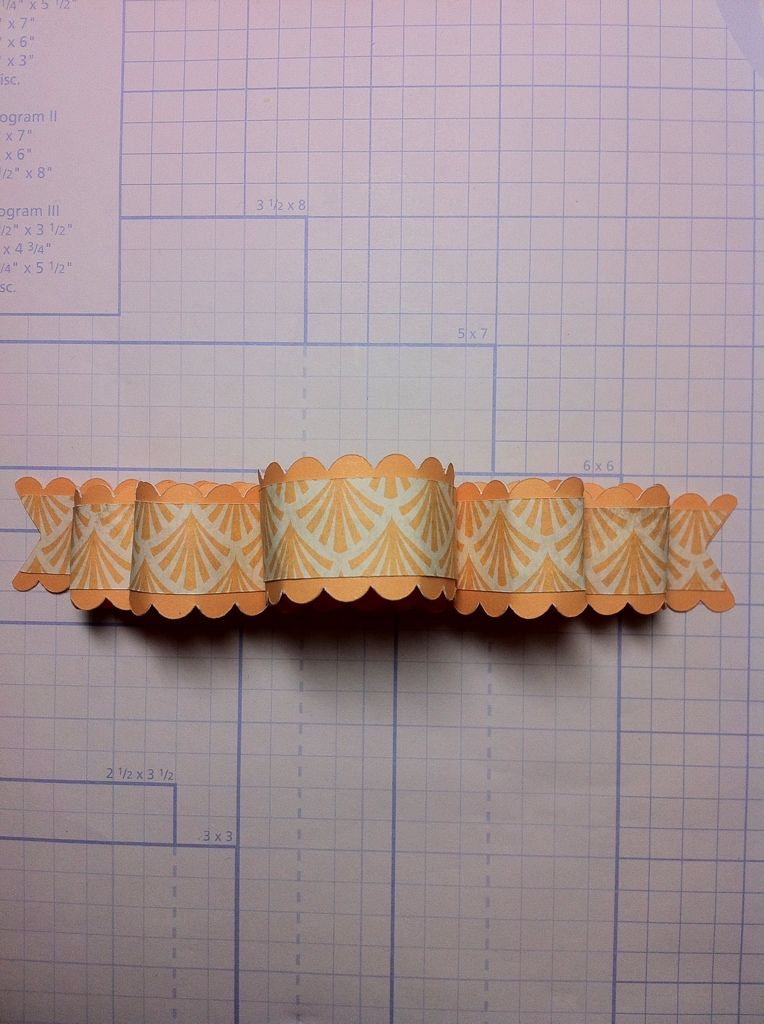
| This is the shift cut and is also cut at 4". |
 |
| I then glued them all together. |
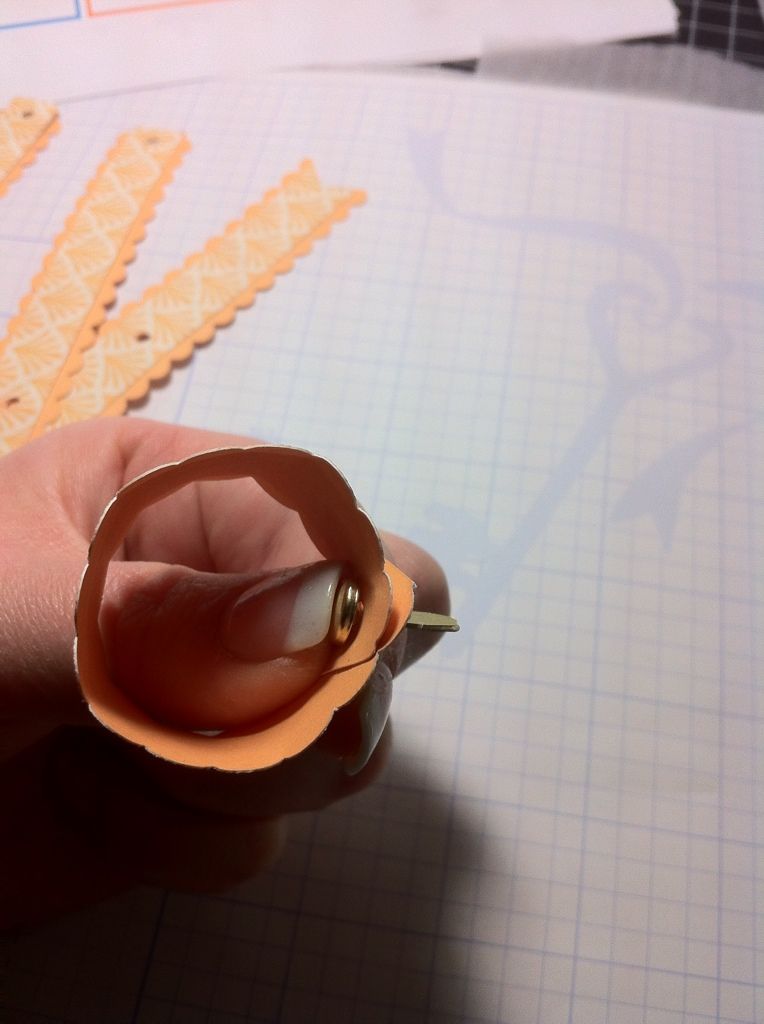 |
| Using the shortest piece, I made a loop and push a brad through the hole to keep it in place. |
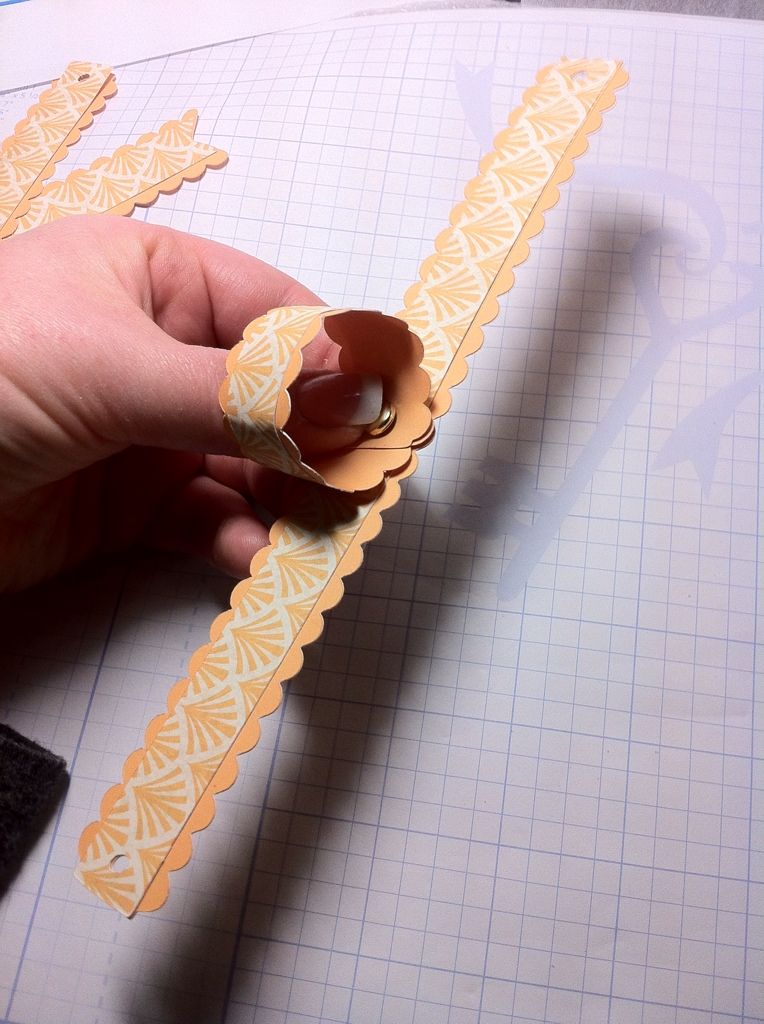 |
| Then I added the second smallest piece. I drew in each end and added it to the brad. |
 |
| This is what it looks like when you have completed this step. Do not bend down the legs of the brad yet. |
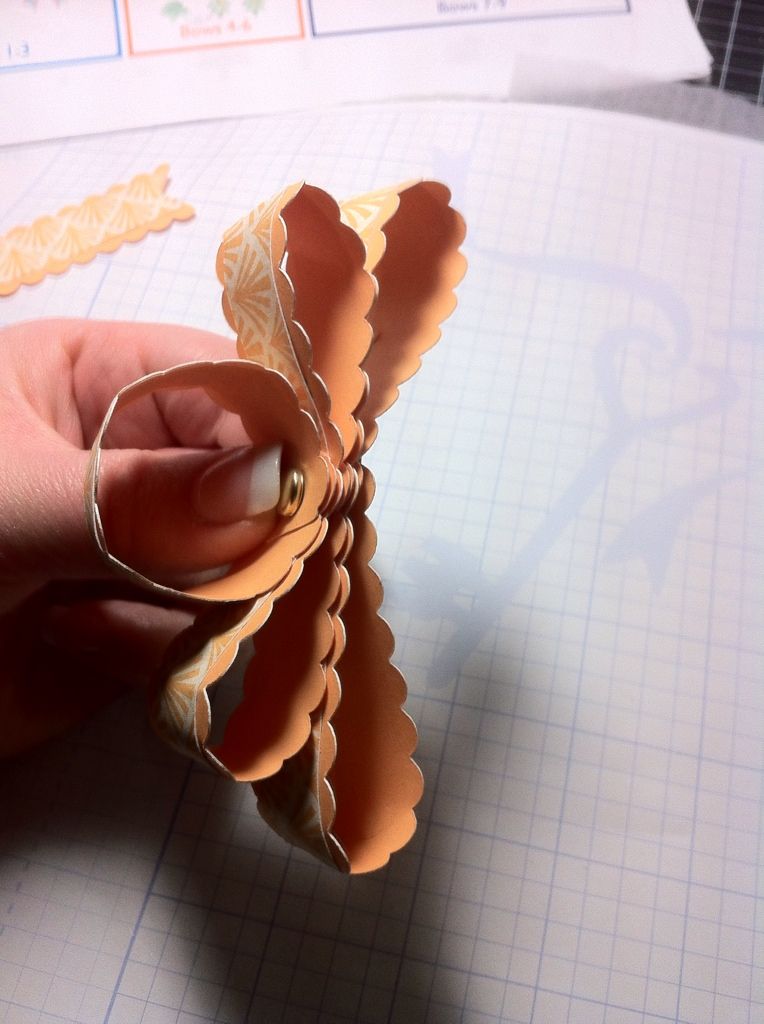 |
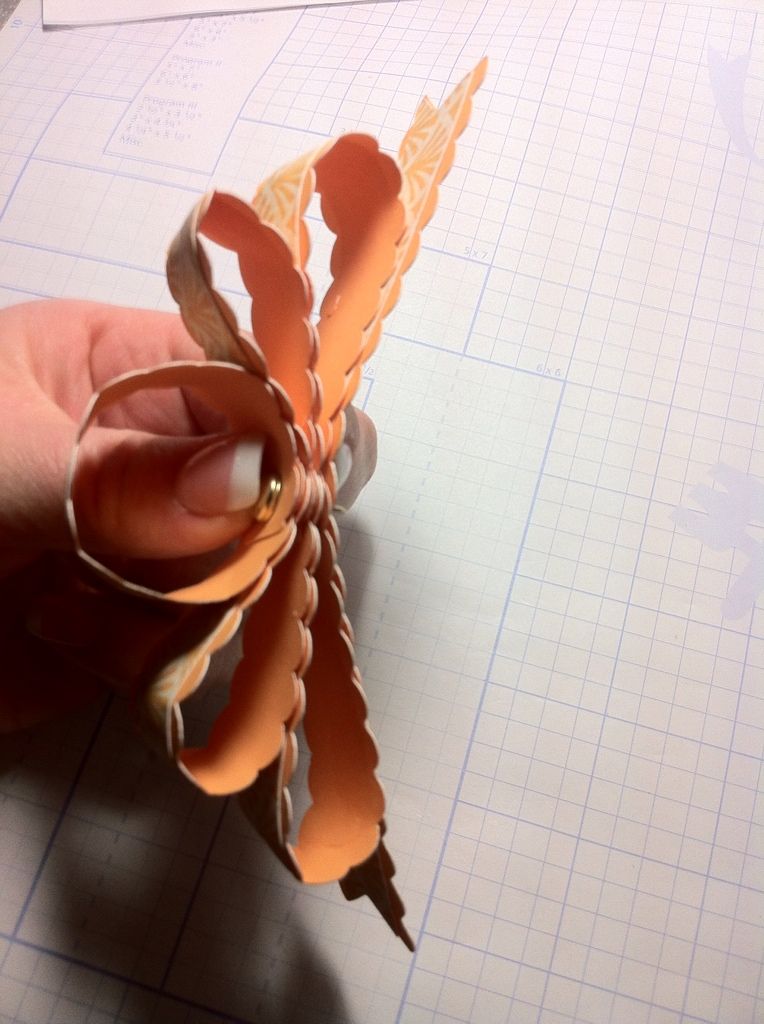
| Repeat that step with the largest piece. |
 |
| This piece is the ribbon tail. |
 |
| Stick the brad through the center and now you can bend down the legs of the brad. |
 |
| VOILA! |
November Specials:
November stamp of the month

Holiday Wishes stamp set that is only $5 with a $25 stamp purchase.


When you place a minimum order of $25 in My Acrylix® stamp set starting today (until November 30th), you can purchase a new D-size Holiday Wishes stamp set for only $5 (Stamp of the Month, K-size customized name stamps, Cricut® Art Philosophy collection, and Workshops on the Go™ kits do not count
toward a qualifying purchase.)! That’s significant savings off the full
retail value of $17.95 US / $19.95 CAN. And here’s a bonus: many of
the images in the set coordinate with our Cricut® Art Philosophy cartridge for added cutting and stamping fun!
So to break it down,
-If you spend $25 in stamps, you get the Holidays Wishes stamp set (retail price $17.95) for $5 (Stamp of the Month, K-size customized name stamps, Cricut® Art Philosophy collection, and Workshops on the Go™ kits do not count toward a qualifying purchase.)!
-These two offers can be combined. For example, if you spend $25 in
stamps and an additional $25 on anything else in the catalog you will
get both stamp sets for a total of $10 ($5 per set).
You save $25.90! Which means the stamps practically pay for themselves!
*note* You MUST add discounted stamps to shopping cart when prompted
by the system during checkout. Stamps cannot be added after the sale
is complete and finalized. Also, adding the stamps to your cart
BEFORE being prompted by this system will result in being charged full
price for promotional stamps.

Have a WONDERFUL Wednesday!
 Subscribe to Courtney Lane Designs by Email


38 comments:
WOW 1st one again. I am lovin' your bows and tutorials. I even purchased this 3d Bows cartridge yesterday geeze only $9.99 can't beat this. Thanks for all your creative instruction U R a gr8 teacher I'm thinkin' my pkgs R going 2 have gr8 bows!
Once you show the steps, this bow actually isn't hard to make at all! Hope you and your family have a great Thanksgiving!
I'm really loving all these bows since seeing your tutorials on them. They're really so easy and quick to make! And so great that you can customize them to the wrapping paper you're using!
Thanks for the chance to win!
This is so helpful. I love the thought of using paper to match my packages. Thankyou.
I am looking forward to trying this one as it looks so very elegant and would add piazz to any package. TFS
Melanie, I'm so thankful for all the great ideas you and Joy share! These bows are so wonderful and it could be really hard to figure out how to assemble them, so thanks again for all the helpful tips you've been sharing! I hope you have the best Thanksgiving ever! Art Philosophy is on my Christmas wish list, so hopefully someone I love will be ordering that from you soon!
Wow! thanks for the tutorial! I am such a visual learner and you are a great teacher!
WOW! These bows are so easy,who would have known!Thanks for the tutorial on the 3-D bows & all your tips.We can now have matching bags,bows & cards VOILA!!! Can't wait to see the last one!Have a Very Happy Thanksgiving!
Thanks for a wonderful year of sharing your craftiness, Have a Happy Thanksgiving...My Cricut Mini
came yesterday. Whoohooooo!
Dawn RI
This is gorgeous! It would make such a lovely trim along the top of a gift bag!
Thanks for another great tutorial!
Thank you so much for the tutorials on the bows.
Happy Thanksgiving to you and your family!
Thank you so much for the wonderful tutorials on how to put these bows together. They are beautiful! I hope you have a wonderful Thanksgiving! lindagk23
thanks so much for showing how to do these...this is the only digital purchase I made so far, am glad to see how they're put together. Happy Thanksgiving!
Once again, THANK You! For these step by step bow tutorials. I'm saving each of the emails so I can refer back to them. Hope you and your family have a blessed Thanksgiving.
TTFN. dpookybear at yahoo dot com
First of all, Thank YOu for taking the time to share your creativity! It helps me when I can "see" the steps, as I am a visual learner! I've not even gone into the CCR yet...I think once I go in there I will be "stuck!" I will have to take a peek at the blog link you shared! Again, Thank you for sharing your wonderful talent with the rest of us that are "creatively challenged!"
Gorgeous...I'm starting to want this download now...hmmm...
Lee-Ann :)
This is awesome! I totally want this now, hehe! Thanks so much for selling me and for the tips!
Lisa
You always make projects look so easy! THS!
Thanks for sharing the step by step. Much easier to try and do when you have a visual aid. Thanks for sharing all the info I can't wait to try it.
This is my FAVORITE bow from the group of Digital bows! When I saw it I knew I HAD to have this Digital cartridge! Thanks again for showing how easy it is to make them! :o)
Theresa
beautiful!!!!!
I can't wait to get this cart!!!
Just very thing I was interested in ,you show the way and we will follow ,love the bowa .
thank you for the tutorial, love the paper
Thank you for another great tutorial! I appreciate all the little extra tidbits you always share...thank you so much!
Awesome bows and thanks for the tutorial!
Beautiful bow. I am loveing the whole idea of these cuts. Makes coordinating wraps, cards, boxes and such sooo easy.
Happy Thanksgiving!!
Carol
Thanks so much...that's what I'm talking about...A guide to the more "complicated" bows! This is one of the first digital carts I purchased in Cricut Craft Room and am so excited you're giving tutorials!!!
peifert88@gmail.com
This bow is beautiful as well. TFS! :-)
I just love these bows. I use to cut these types of bows by hand. This is one of the digital carts that are on my list. I need to learn CCR though. Thanks for sharing. Happy Thanksgiving!!!
beautiful bow. Happy Thanksgiving!
Hello Courtney Lane & DT just wanted to say
Happy Thanksgiving Day to You and Your Family!
Blessing AJ
I love your demos, so helpful. I hope to download this cartridge in the near future!!
You make it look so simple, even I can do it. I'm very thankful for you and all your sharing of wonderful ideas. Happy Thanksgiving you to you and your family!
Thanks for the bow tutorial. You make it look so easy.
those are great bows and would look great on anything. thanks for all you do and share. 1205love@gmail.com
Thank you so much for the tutorials. Love your choice of papers you're using for the bows. Thank you also for the link to the CCR blog. They have some excellent info on their site. Have a wonderful weekend!
Loving these bow tutorials. I think I'll have to make time to check out the Craftroom this weekend!
Post a Comment