I hope you all had wonderful weekends! We actually started putting up our Christmas stuff in the front yard. I know I know...Thanksgiving is not until Thursday, but I just felt like making my life a little more jolly. There is just something about twinkling lights that makes me smile!
Ok my sweet sweet blog followers, this week I have some tutorials for you.I noticed in the comment section that a few of you were perplexed on how the bows on the NEW 3D Bows Cricut Craft Room cartridge were made. I agree that they are not the most intuitive, so some tutorials were in order! I cut them all out at the same size (4"), so you could see them in scale. The traditional gift bow is quite a bit smaller than the the others!
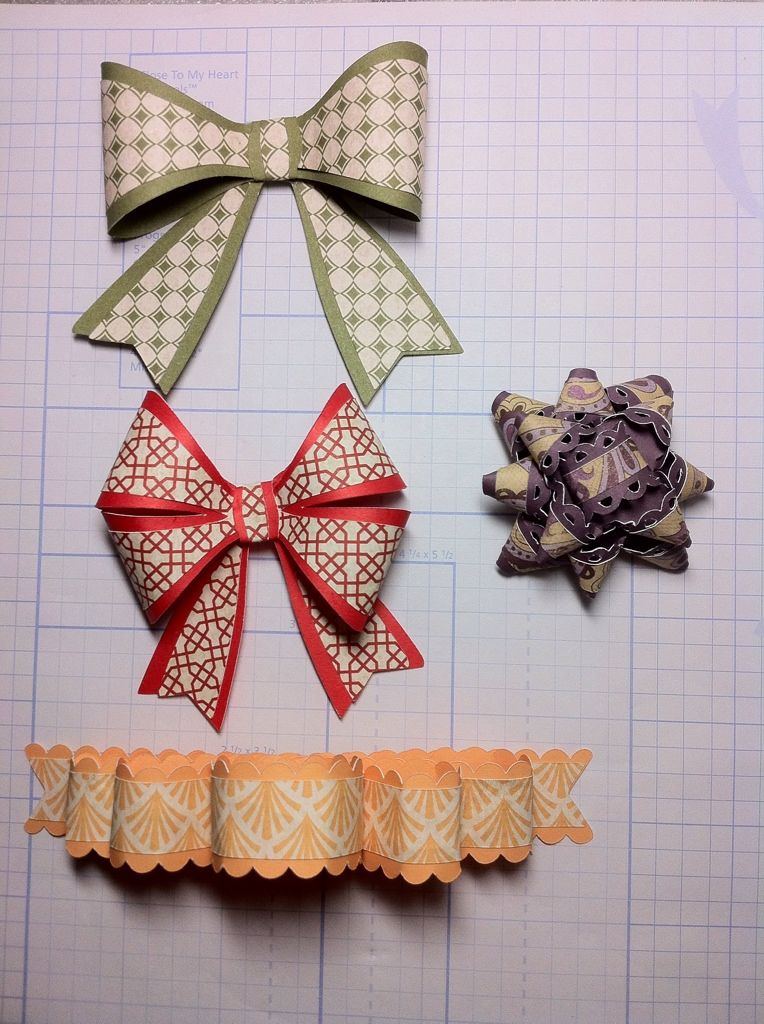 |
| Here is a picture of all of the bows I will be showing you this week. |
Today I am showing you how to make the green bow on the top. It is the simplest of the bunch. I figured we would start out easy and work our way up. Now just so you all know, once you know how to make them they are all easy. In fact, you could easily crank these out for Christmas gift wrapping with ease. I think if you did that you might actually save money. Some of those bows can be so pricey!
I am going to refer to this bow as a single loop bow. That way when I refer to it later you guys know what I am talking about ;-)
All paper used is from Close To My Heart. I found that since it is a lighter weight cardstock it was much more pliable and easier to use when making these bows. The patterned paper is from the paper back called Elemental.
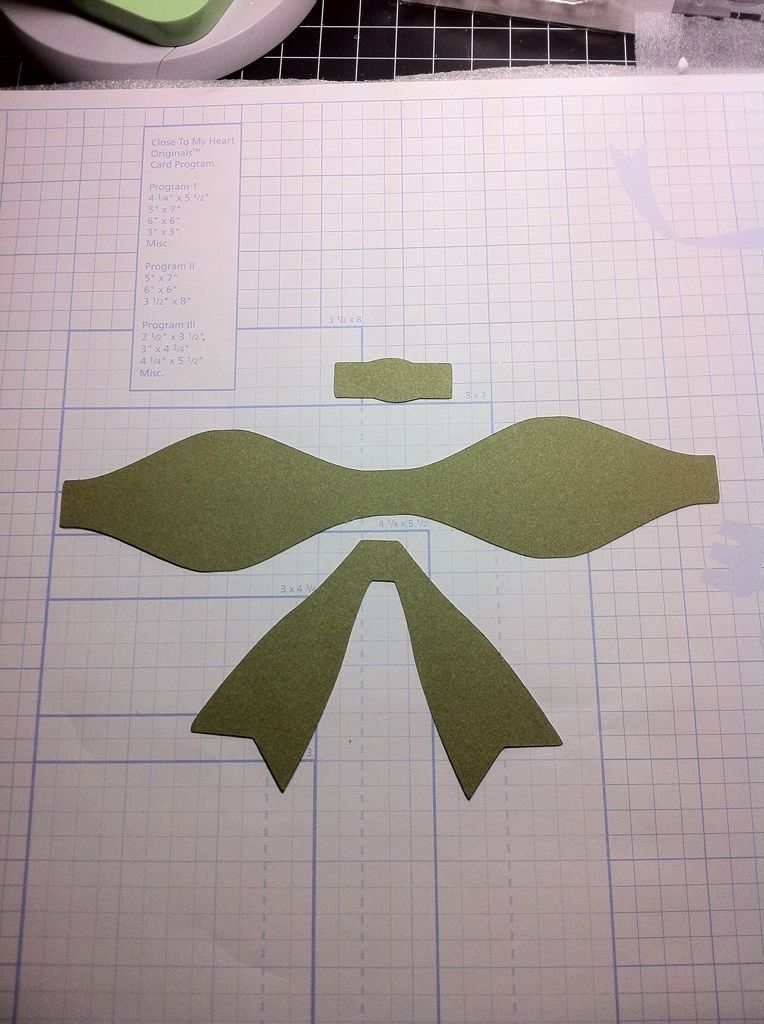 |
| These are the base cuts and were cut out at 4". |
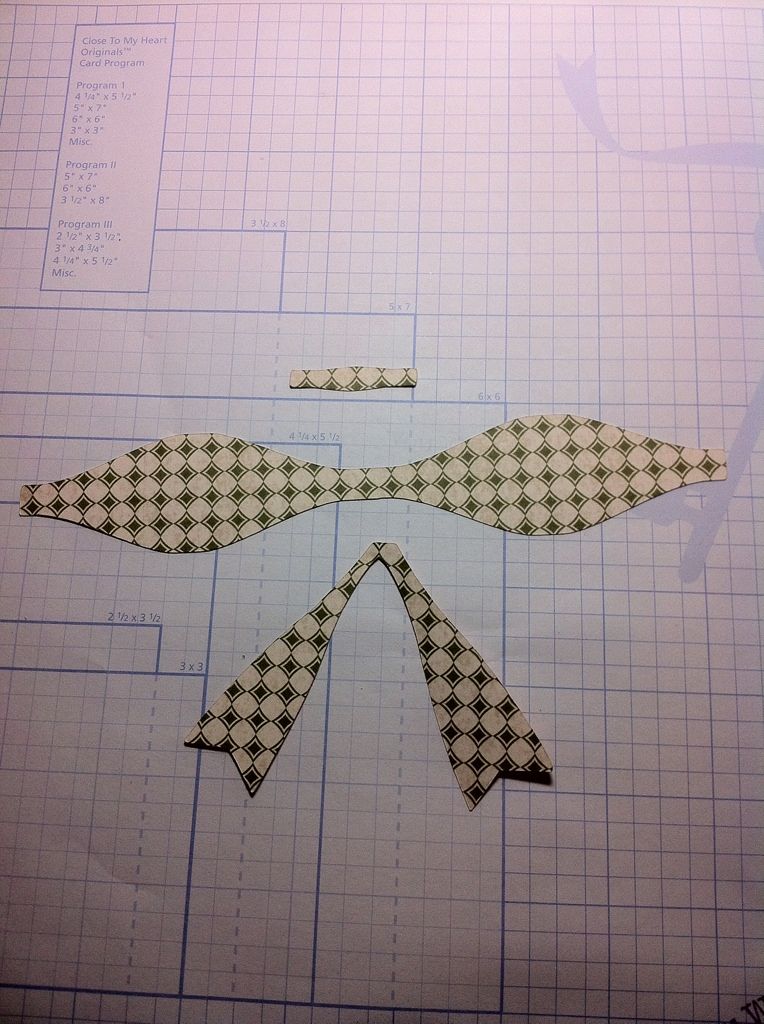 |
| This is the shift cut and was also cut at 4". |
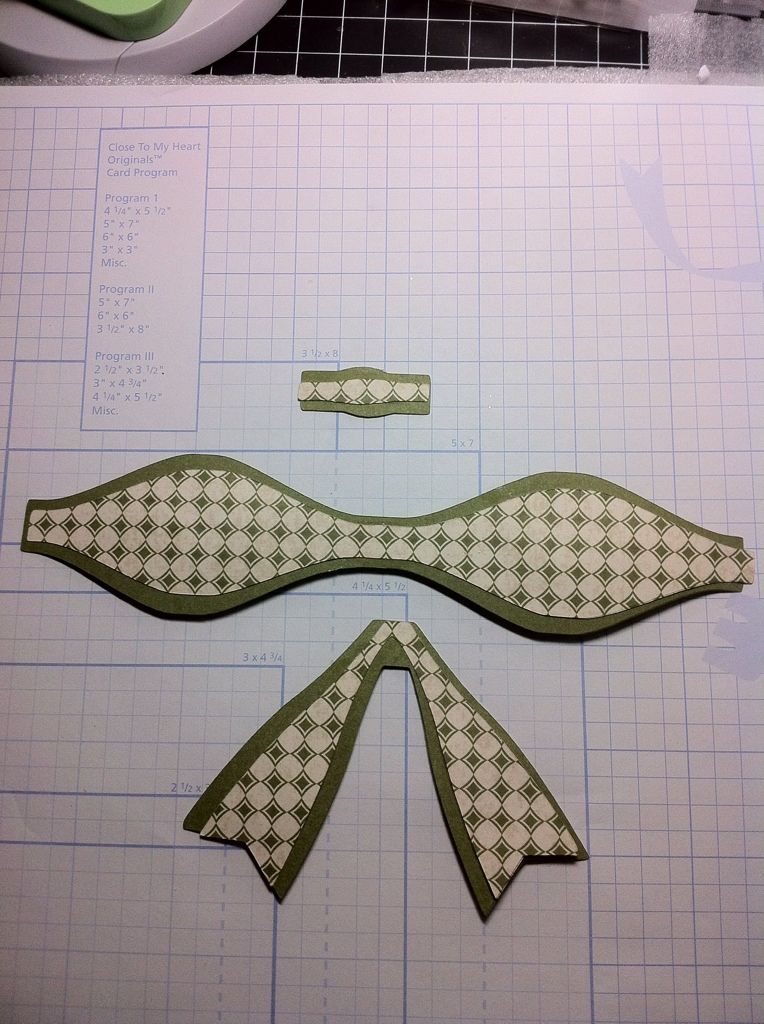 |
| I then layered and adhered the pieces together as shown. |
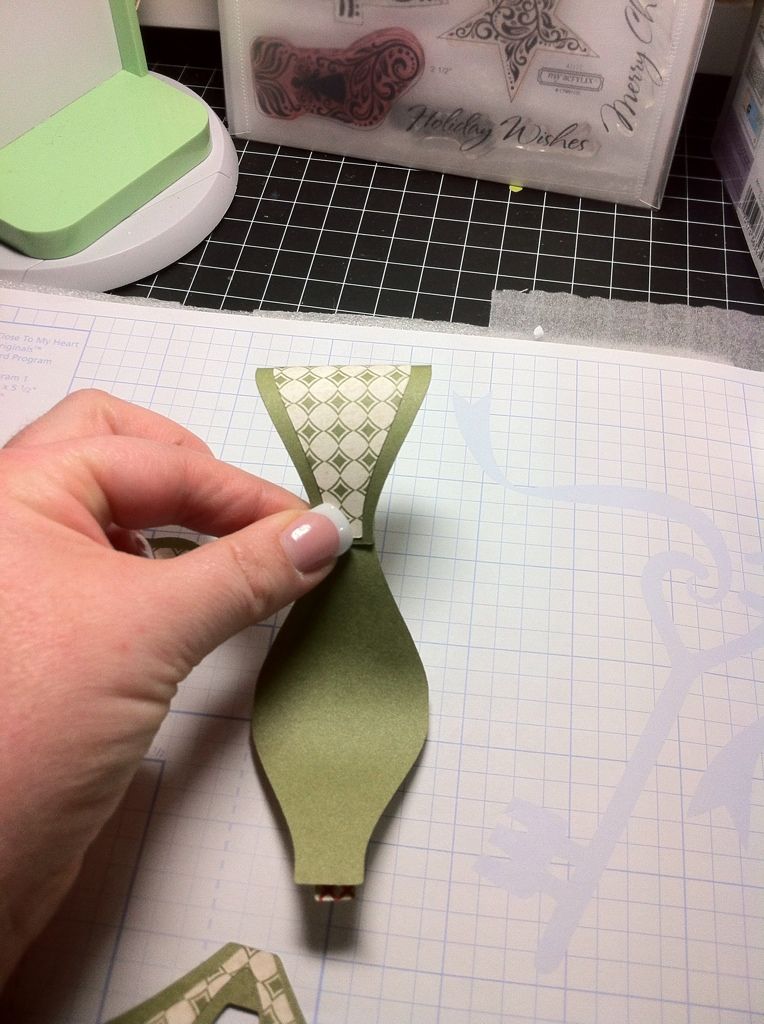 |
| Then, turned over the the cut and drew in one of the sides and glued it down to make the first loop. |
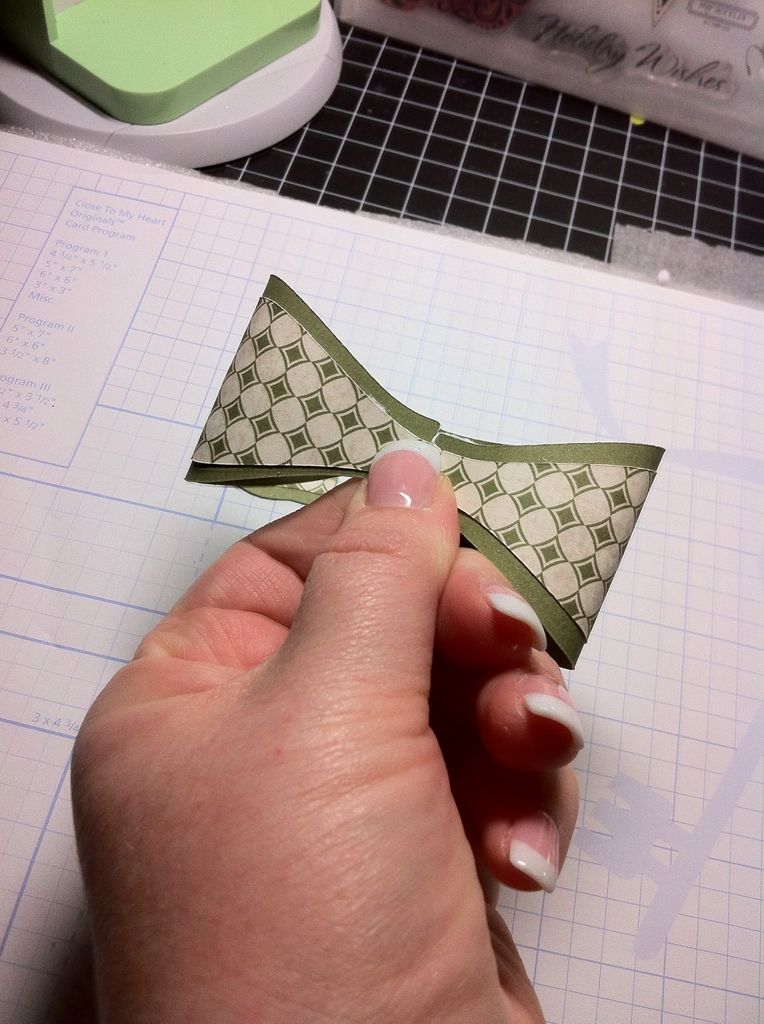 |
| Then repeated that process on the other side. |
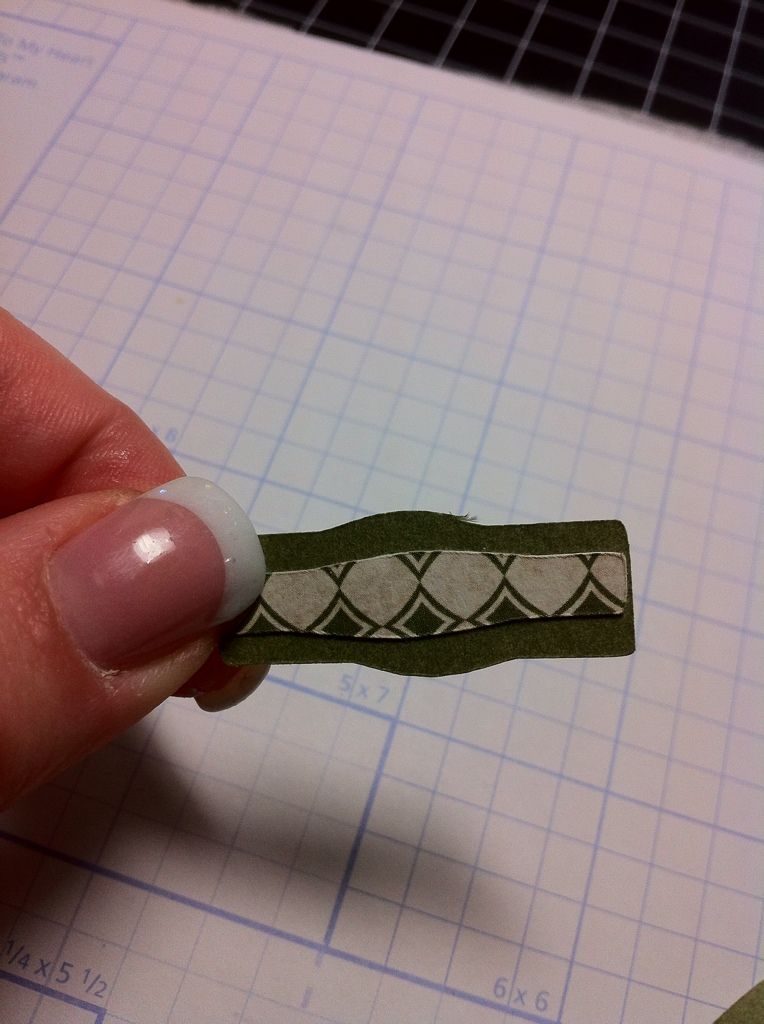 |
| This is the center piece. |
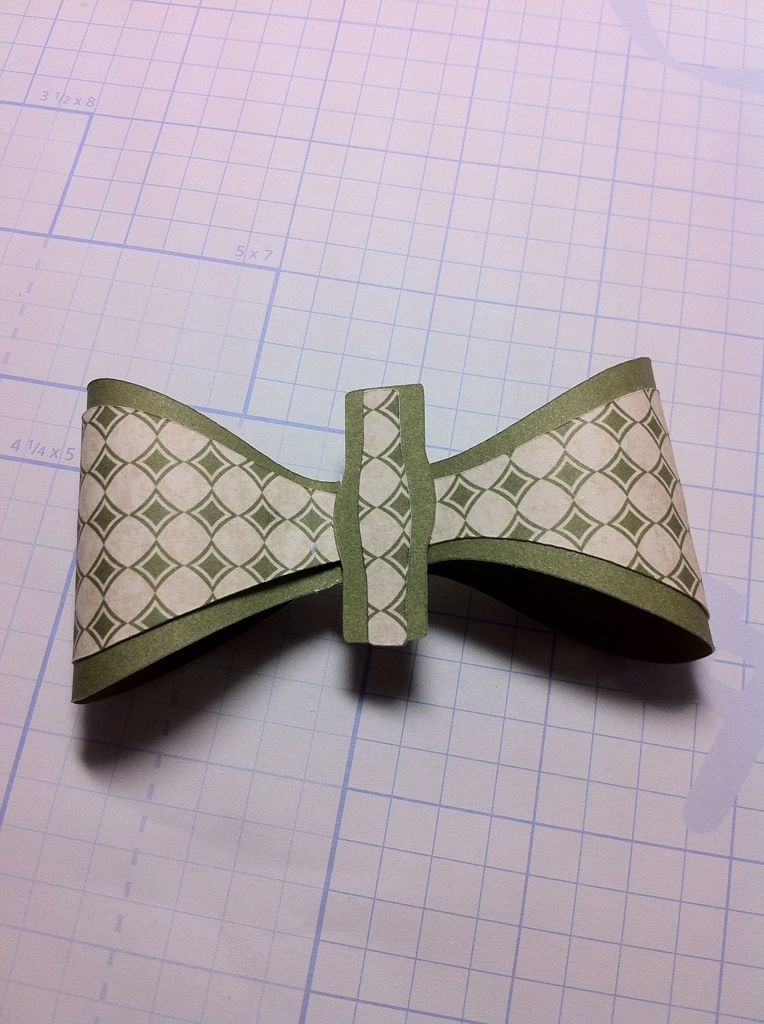 |
| I turned the bow back over and wrapped the centerpiece ..well around the center and adhered it. |
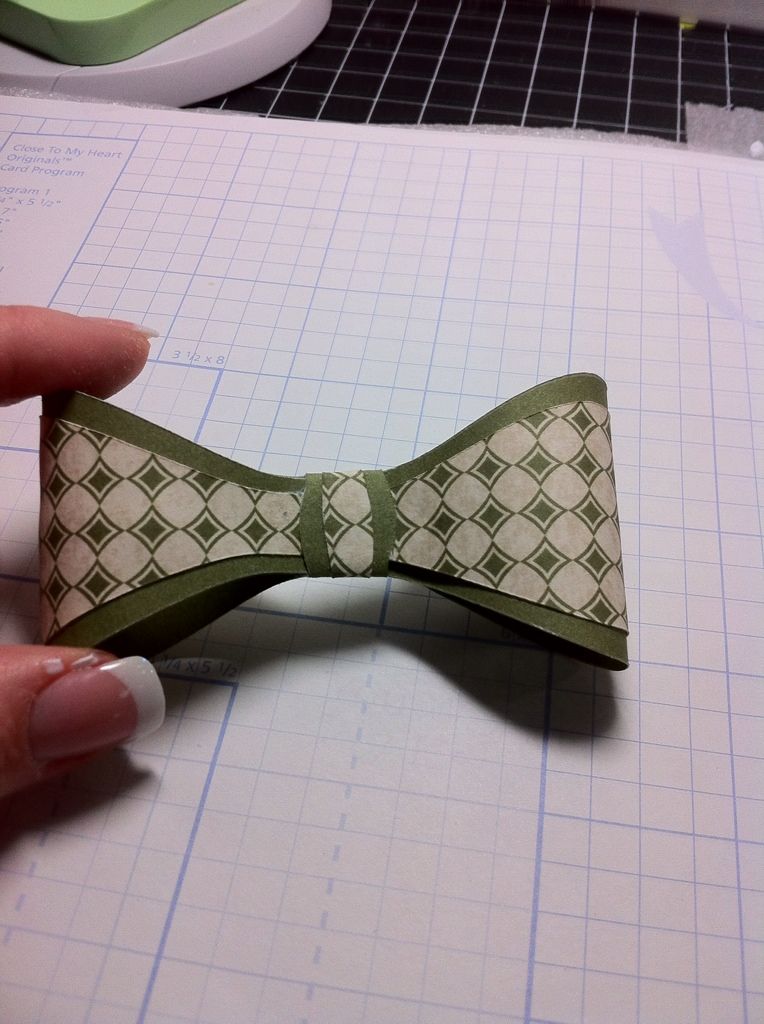 |
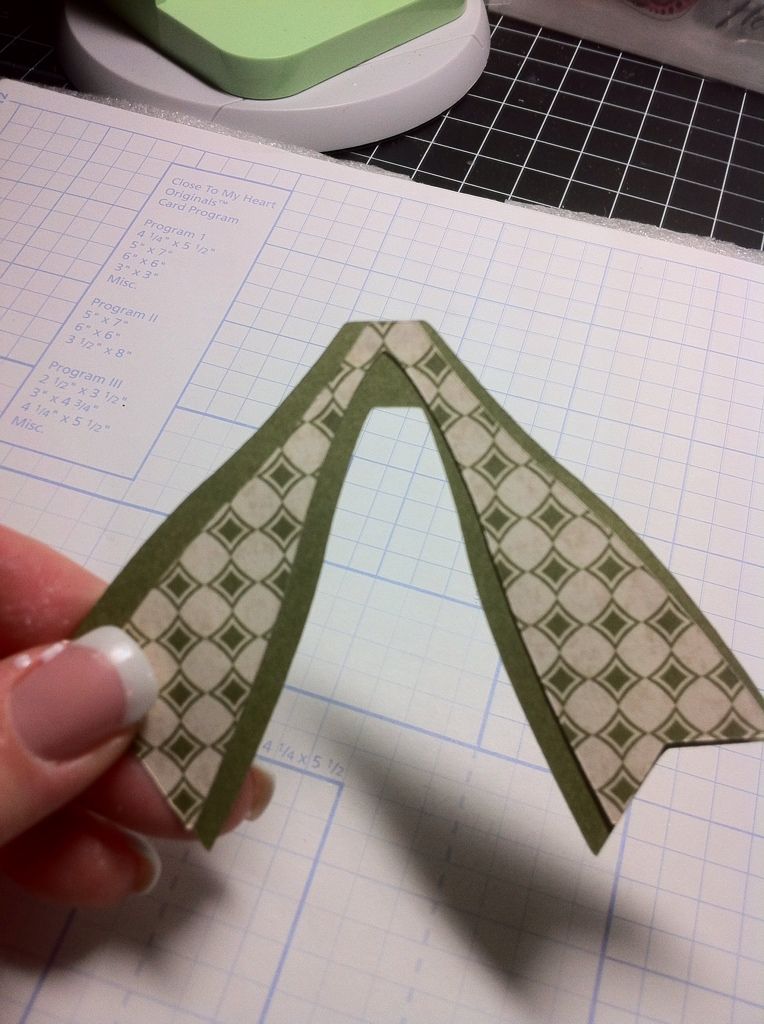 |
| This is the tail of the bow. |
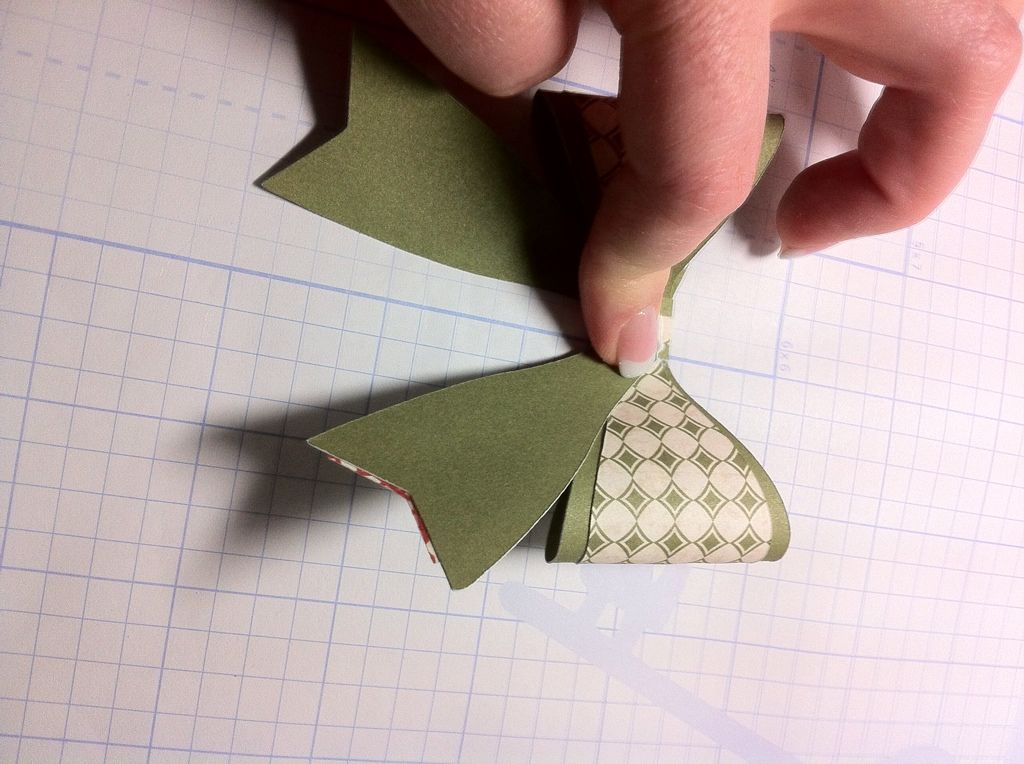 |
| I flipped the bow over on it's front side and adhered the tail to the back. |
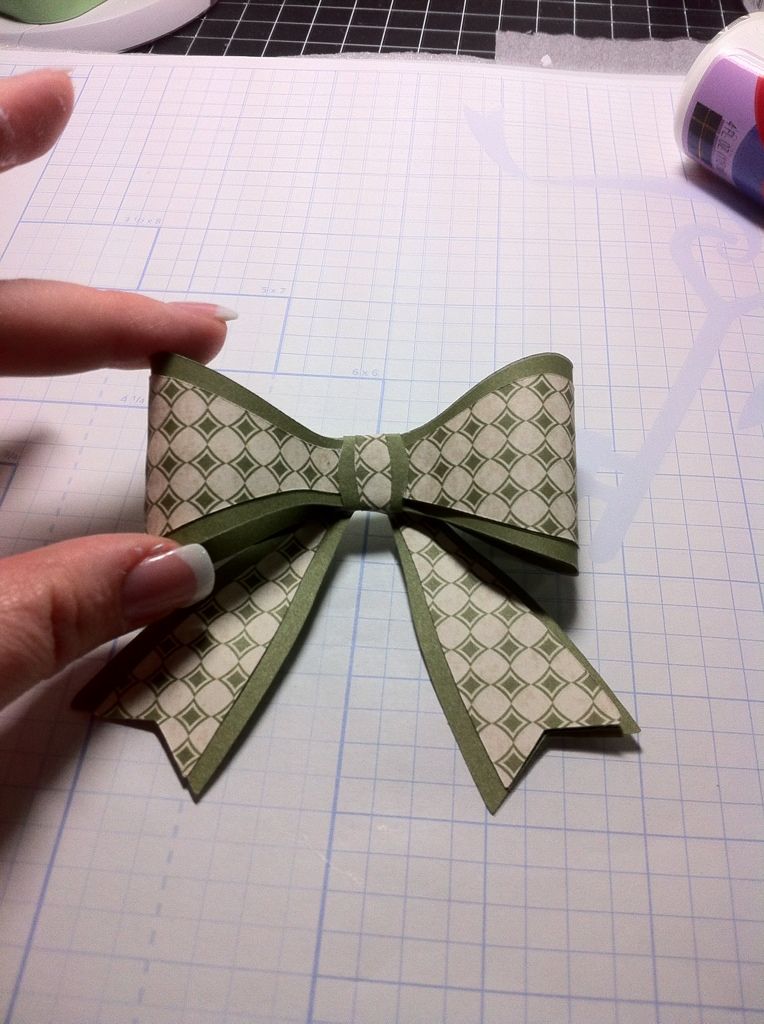 |
| VOILA! |
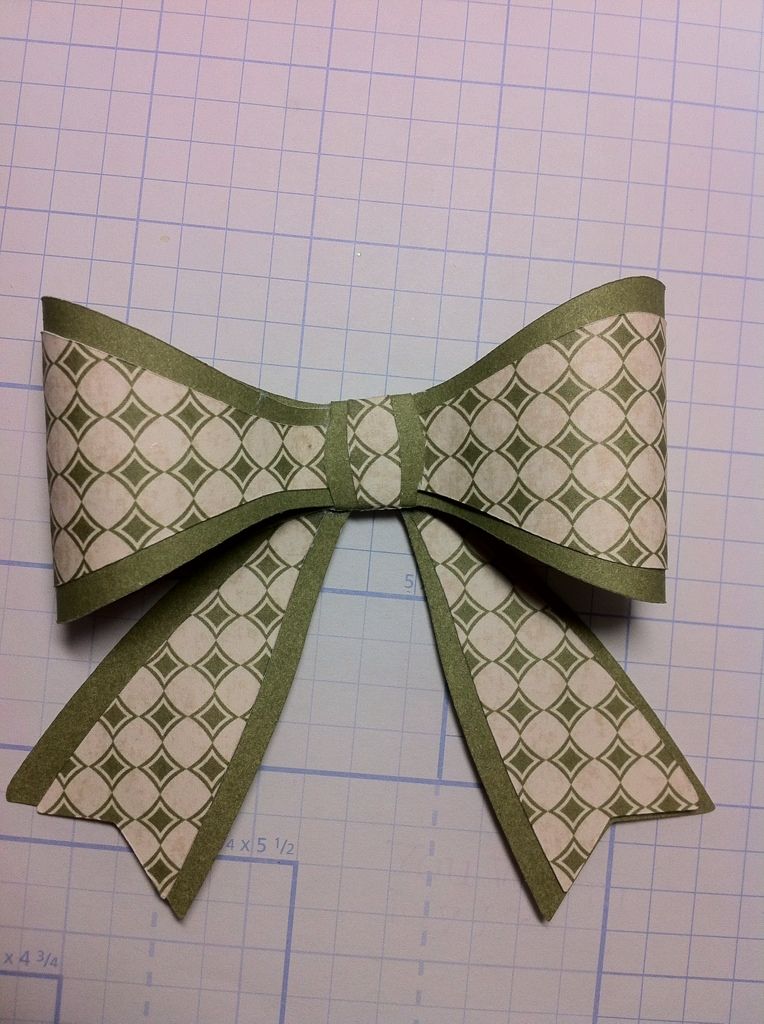 |
| This seriously took just a few short minutes to make! Easy peasy lemon squeezy!! |
November Specials:
November stamp of the month

Holiday Wishes stamp set that is only $5 with a $25 stamp purchase.


When you place a minimum order of $25 in My Acrylix® stamp set starting today (until November 30th), you can purchase a new D-size Holiday Wishes stamp set for only $5 (Stamp of the Month, K-size customized name stamps, Cricut® Art Philosophy collection, and Workshops on the Go™ kits do not count
toward a qualifying purchase.)! That’s significant savings off the full
retail value of $17.95 US / $19.95 CAN. And here’s a bonus: many of
the images in the set coordinate with our Cricut® Art Philosophy cartridge for added cutting and stamping fun!
So to break it down,
-If you spend $25 in stamps, you get the Holidays Wishes stamp set (retail price $17.95) for $5 (Stamp of the Month, K-size customized name stamps, Cricut® Art Philosophy collection, and Workshops on the Go™ kits do not count toward a qualifying purchase.)!
-These two offers can be combined. For example, if you spend $25 in
stamps and an additional $25 on anything else in the catalog you will
get both stamp sets for a total of $10 ($5 per set).
You save $25.90! Which means the stamps practically pay for themselves!
*note* You MUST add discounted stamps to shopping cart when prompted
by the system during checkout. Stamps cannot be added after the sale
is complete and finalized. Also, adding the stamps to your cart
BEFORE being prompted by this system will result in being charged full
price for promotional stamps.

 Subscribe to Courtney Lane Designs by Email
Oh My, I'm the first one again...whoa what's goin' on? Ok...Ok...sorry I digressed ..... Love the bows you did a great job not only on the bows but also on your tutorial.....
ReplyDeleteps....great nails too!!!
I'm very glad to see tutorials on the bows, they looked a little complex. thank you.
ReplyDeleteThank you for showing us the bows, can't wait to see the rest.
ReplyDeletethanks so much for reviewing these digital cuts, this is one of the digigtal packages that i think i will be getting thanks for everything
ReplyDeleteupnurse at aol dot com
This comment has been removed by the author.
ReplyDeleteThat bow is adorable. I'll be watching for your other bow instructions. And thanks too, for the opportunity to win the beautiful Frames cartridge. I sure would enjoy that!
ReplyDeleteGrace
http://gracenotes4today.blogspot.com
http://gracenotesallaboutChristmas.blogspot.com
Thank you for sharing this...yes you are right, the bows do appear to be very easy! I do agree, this could be a major savings! Thank you again!
ReplyDeleteLove the tutorial, did take a look at these and thought they looked complicated. Can these be downloaded to the gypsy for cutting? Don' t use my computer for cutting. Thanks for all the great tutorials and the chance to win.
ReplyDeleteThank you for the tutorial. After seeing your bows, I think I'm a lot more interested in this cart.
ReplyDeleteThanks for showing how the bow goes together. So pretty!
ReplyDeleteHave a wonderful Thanksgiving. I'm thankful for your blog!
Thanks for the bow tutorial. How easy is it to download the cartridges?
ReplyDeleteLove the bow...
ReplyDeleteDawn RI
Thanks for the step by step tutorial. You made it look so easy and the papers you used are beautiful. TFS
ReplyDeleteTTFN. dpookybear at yahoo dot com
This put me over the edge - ordered this and will be testing out the Craft Room with it. Thanks so much for all you do for this hobby.
ReplyDeleteAll the bows are beautiful and you sure made this one look easy. So hopefully we all will be making perfect bows soon.
ReplyDeleteGorgeous bow, and you are so awesome to make tutorials for us!
ReplyDeleteI love these 3D bows. I have to get it. I haven't really used the CCR but I have played a little on it. Can you download the digital cartridges to you Gypsy yet?
ReplyDeletesyoung6987 at aol dot com
When I first seen this cartridge I thought "I GOTTA HAVE IT"! Now with you showing the tutorial on how to make them I'm going to go get it! THANKS! :o)
ReplyDeleteTheresa
Very cute. Can't wait to see how to do the rest of the bows
ReplyDeleteToo neat...great step by step guide!! Lee-Ann :)
ReplyDeleteThank you so much for putting this tutorial together. I'm sure it took time and effort - and I want you to know that it is much appreciated!
ReplyDeleteWell that looks easy enough! Thanks for the step by step. Cute bow. : )
ReplyDeleteThe bows look fun to make and they turn out so elegant.
ReplyDeleteThank you so much for this!!
ReplyDeleteThank you for doing the tutorial on this can't wait to see the others!
ReplyDeleteCute bow- can't wait to see whatelse you have in store for us this week. Thanks for the chance to win the Fancy Frames cartridge. Happy Thanksgiving!!
ReplyDeleteThese bows are beautiful. I can't wait to start making them.
ReplyDeleteHow darn cute! Looks easy enough! But I'll wait to see all the tutorials first! Thanks!
ReplyDeleteTammy B.
I am so darn glad you decided to do this..I just purchased this cart in the craft room this past Friday! I printed out the sheet that shows you how to put them together, but it's just a whole different thing to see an actual tutorial. What would have taken much longer to figure out (especially with the multi-piece ones) will be a breeze now!
ReplyDeleteThanks a lot for doing this!!
peifert88@gmail.com
Thanks for sharing the tutorial! All the bows are so pretty!!! :-)
ReplyDeletethanks for the info. on completing the new bows.
ReplyDeleteThis is a great tutorial series - it will help me to decide if I want to make the digital purchase. Now if I could just get CCR to work with my Imagine!
ReplyDeleteKaren L 1020 at gmail dot com
These bows are great! I can't wait to try them myself.
ReplyDeleteThank you so much for the tutorial on the bows! That helps a lot! Have a wonderful day! lindagk23ataoldotcom
ReplyDeleteThank you so much for the tutorials. I love the bag you did and the bow adds so much to it.
ReplyDeleteThese bows are incredible!!! Thanks so much for showing how to assemble them!!!
ReplyDeletevery nice, love the digital images, thank you for the tutorial
ReplyDeleteThanks so much for the tutorial! And, once again you have made a cartridge much more appealing!
ReplyDeleteShellee
I really love the bows! I really like your step by step tutorials...thanks for doing them! Can't wait for the gypsy compatability! (It seems easier to transfer to gypsy than haul my cricut(s) to my computer)...Hurry PC...
ReplyDeleteVery pretty bow. This looks like an interesting cartridge. Thanks for sharing the tutorial.
ReplyDeleteI love the endless possibilities that this cartridge provides. You can have matching bows for any gift!
ReplyDeleteWow, Melanie, you make these bows and ribbons look so easy. TFS!
ReplyDeleteThanks for making it look so easy. Can't wait to try it. Thanks for sharing.
ReplyDeleteThis is a must have for sure. Love the idea of makeing 3D paper bows. I love to have bags, cards =, boxes and such that all match.
ReplyDeletecute bow thanks for showing us how to's. thanks for all you do and share. 1205love@gmail.com
ReplyDelete